


Switching on and Preparing the Hypertronic Pro for Use
This instrument is designed to be used in a holistic holographic broadcast-mode where all the subtle energy rates are broadcasted simultaneously. Optionally, one may use rates by referencing a Radionics Rate Book and then broadcast the healing frequency remotely using a biological sample, or there is the alternative of making a vibrational remedy.
Plugging the Hypertronic Pro into the Power Supply
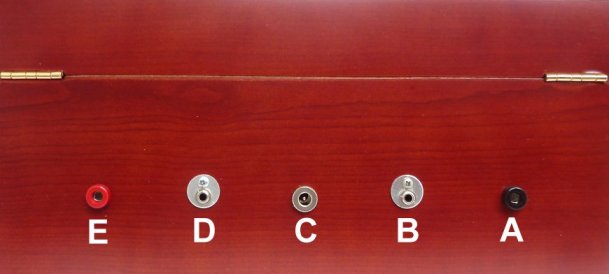
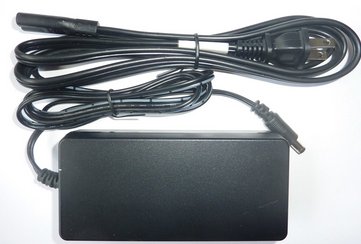 Plug the 110/240V 12Volt Wall Plug Adapter into a wall socket and the other end into the rear of the Hypertronic Pro into the jack marked C on the rear of the unit (see picture below)
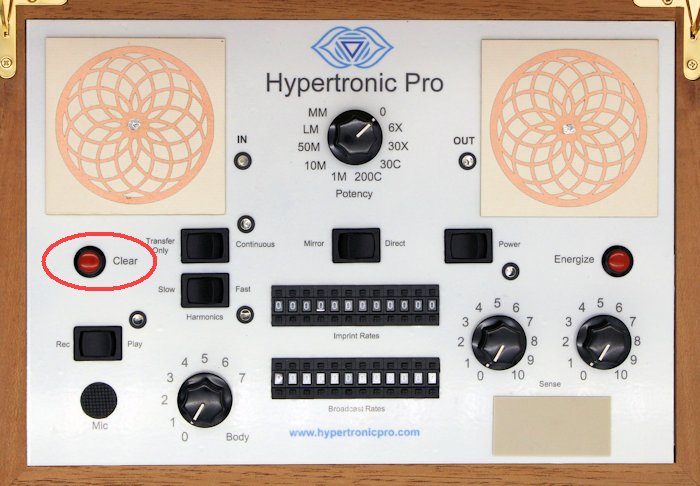
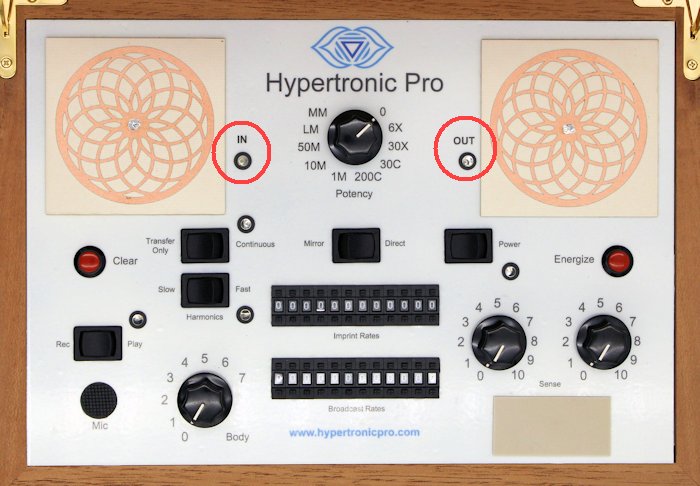
Turning on and clearing the instrument
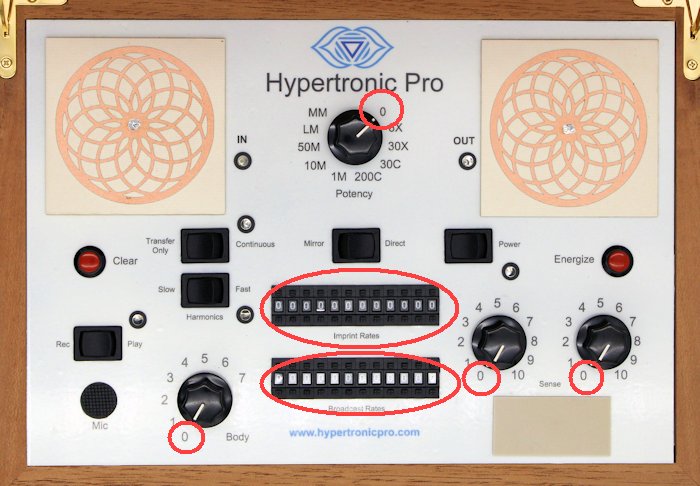
Before switching on the Hypertronic Pro, ensure that all knobs, imprint and broadcast rates are set to zero as shown below, to minimize the possibility of interference.
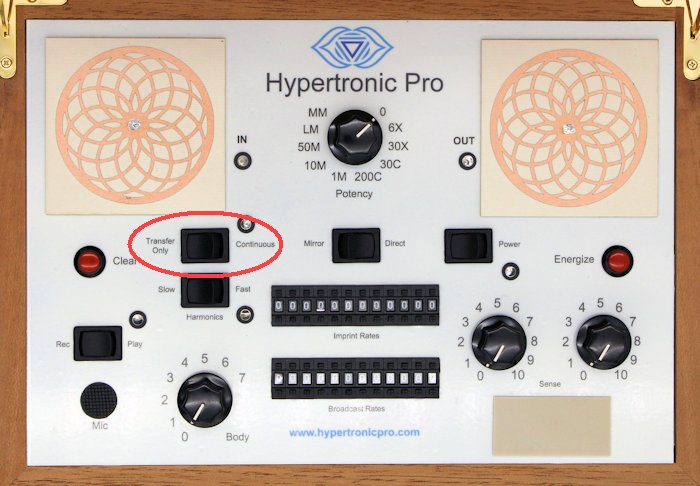
Make sure that the Transfer Only/Continuous Switch is set to TRANSFER ONLY to prevent any immediate broadcast when powering on (which occurs when switched to Continuous).
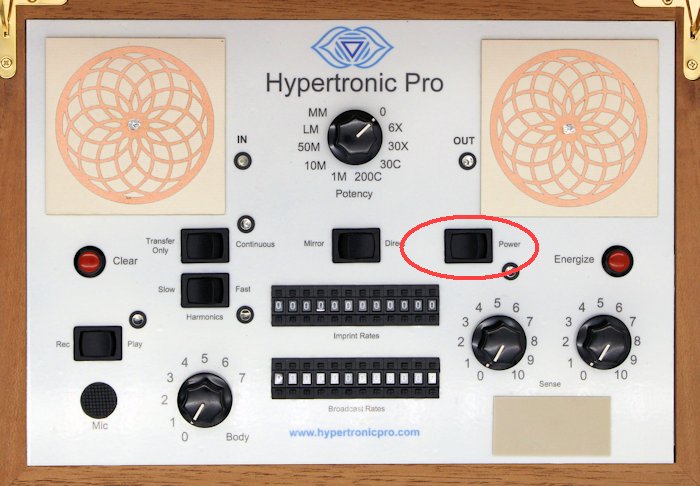
Press the "Power" toggle switch ON.
Wait for the unit to complete 15 second timed clearing process. The IN and OUT lights will glow red while this process is taking place. Wait until both LEDs have stopped glowing (the IN LED will stop glowing first, followed by the OUT LED).
Briefly tap the Record button to remove any recording from the unit's memory.

If the Hypertronic Pro is already switched on, and you need to clear the unit ready for the next patient, reset everything back to zero as described above, clear the witness plate of any biological materials, and then press the Clear button and wait for the 15 second electronic clearing process to complete.